
Use node.js and Cloudmailin API to send emails from chat
There are many cloud base email API providers such as Twilio SendGrid, cloudmailin.com, mailjet .com, etc. These email API providers allow developers to quickly develop email sending applications. For example, verification code, coupon, promotion, signup confirmation, etc. These services provide a way of quick formating of automatic emails for applications including the web application.
Easiio chatbot and live chat plugin is a powerful chatbot and live chat platform. Using ITR for programming, business can use visual editor to create a chatbot in minutes. The powerful feature including, forms and promotions. Forms allow customized form to be used to collect visitor info, feedback or other information. Promotion allows website to display promotion and ask user info such as email to send the promotion details to visitors. And hence promote the conversion of website visitors.

In this article, we will show how to use the Easiio website chat plug-in to collect user info from the website visitors and then use the cloudmailin.com API to send a confirmation email. The application including sending promotion code, coupon, ebook download link, and other useful tasks. This is a technical article and the source code is available on the GitHub for the node.js part.
Step 1. Signup for Easiio Account
Signup for Easiio account is easy. Just go to this link https://www.easiio.com/pricing. Click Register the freemium account to start. After register with the Easiio website, you should get the account info in the email.
Step 2. Configure the website chatbot plugin
After login to the Easiio backend, you can start configure the ITR (Interactive Text Response) for the test chatbot. See Easiio Web Chat Plugin Guide.
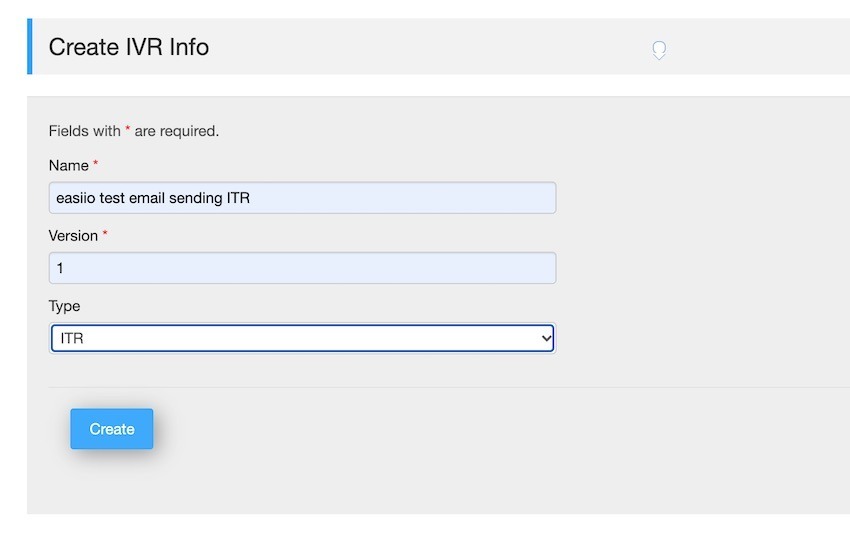
First, create a new ITR. Using "Advanced Configuration" to "Visual IVR", then click create. Fill in the information as below.
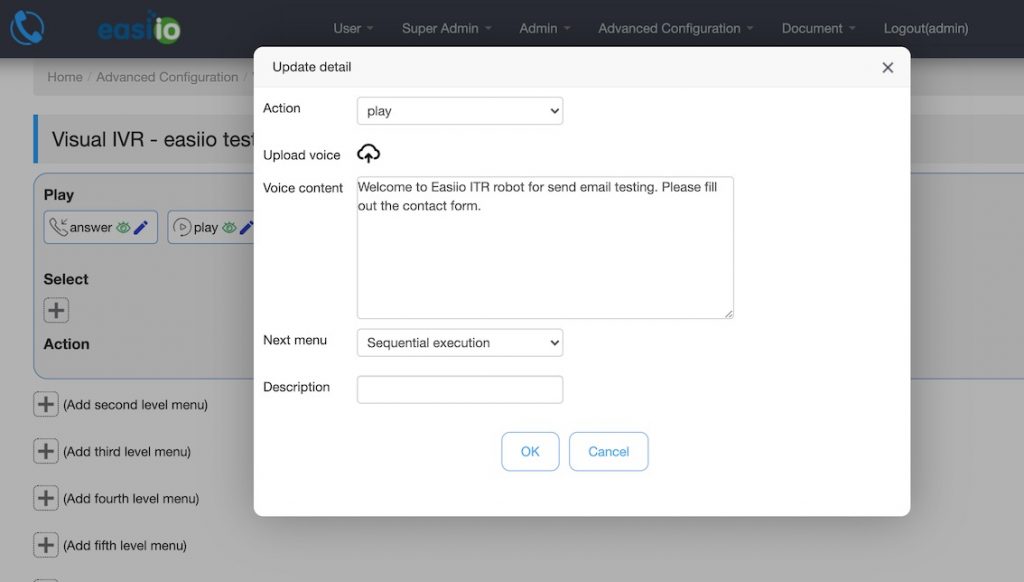
Second, configure the ITR with a Play text and Contact form. Open visual IVR editor for the ITR by click on the "config" link on the Visual IVR page. Click "+" button on the Play row to add a Play element for the display text.
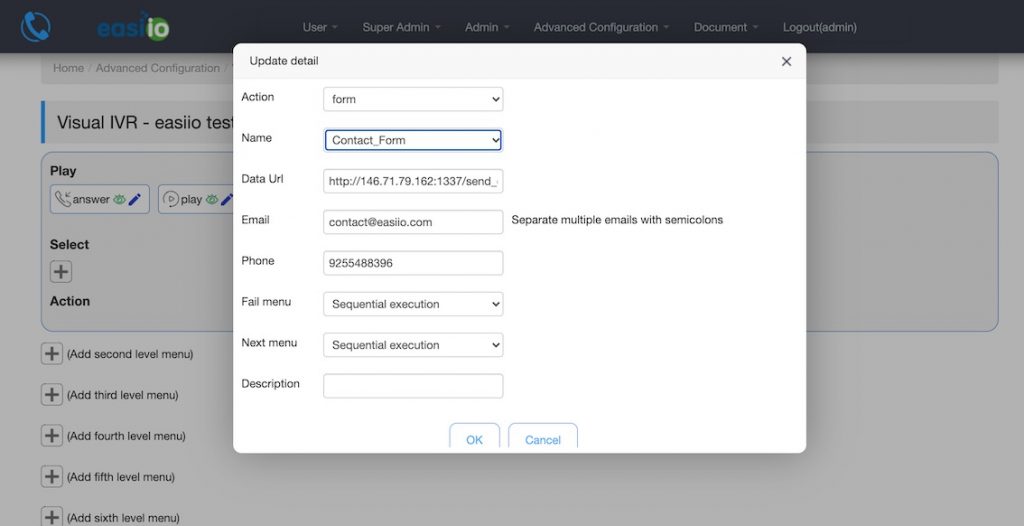
Then, "+" a form element and select "Contact form". The data url is the post API for the JavaScript Node.js interface. Email and phone number is for sending email or phone SMS notification if anybody signup the form.
Step 3. Configure the CloudMailIn
Signup a trial account on https://www.cloudmailin.com. Please follow the instruction on https://docs.cloudmailin.com/ on how to configure the send mail account. It will require you setup DNS for your email server. After the configuration and setup, you will get the hostname, user id, and password for the send email account. Verification from your official email is necessary to activate your send email account on cloudmailin. It was not too bad in terms of setup time. After about 1 - 2hrs, I got it up and running.
Step 4. Configure the node.js http API
For node.js, the JavaScript simple parse the incoming JSON from the Easiio server, and then use cloudmailin nodejs API to send out the email. Remember to install the dependency of the cloudmailin API using command "npm install nodemailer". The source code is in GitHub under the file cloudmailin_sendemail.js. Run the node.js script by the command "node cloudmailin_sendemail.js". You should see something like this.

Step 5. Write the JavaScript to send email via CloudMailIn
Following code is the function to send email by cloudmailin. Make sure you have the module installed. You can change the email content as you like. Remember to change the hostname, username, and password to your account setting.
async function sendMail(email, name) {
  let hostname = "xxxx.cloudmta.net, cloudmailin account hostname";
  let username = "12b2000000000, your cloudmailin account username";
  let password = "uifa0000000, your cloudmailin account password";

  let transporter = nodemailer.createTransport({
    host: hostname,
    port: 587,
    secure: false,
    requireTLS: true,
    auth: {
      user: username,
      pass: password,
    },
    logger: true
  });
  // send mail with defined transport object
  let info = await transporter.sendMail({
    from: '"Sender Name" <jian.lin@easiio.com>',
            to: email,
            subject: "Your request is here",

            html: "Hi, " + name + ",<br>" + "This is easiio promotion link<br>" + "<strong>Coupon code:7jhsk8</strong>",
            headers: { 'x-cloudmta-class': 'standard' }
  });

  console.log("Message sent: %s", info.response);
}
Following code is the Easiio handling of HTTP API post of the contact form info in JSON format. It parses the JSON and print out the email address. Use the email address and name to make call to the sendMail function.
const server = http.createServer(function (request, response) {

   if(request.method === "GET") {
    if (request.url === "/favicon.ico") {
      response.writeHead(404, {'Content-Type': 'text/html'});
      response.write('<!doctype html><html><head><title>404</title></head><body>404: Resource Not Found</body></html>');
      response.end();
    } else {
      response.writeHead(200, {'Content-Type': 'text/html'});
      response.end(formOutput);
    }
  } else if(request.method === "POST") {
    if (request.url === "/send_email_cloudmailin") {
      var requestBody = '';
      console.log("post inbound 1.0");
      request.on('data', function(data) {
        requestBody += data;
        if(requestBody.length > 1e7) {
          response.writeHead(413, 'Request Entity Too Large', {'Content-Type': 'text/html'});
          response.end('<!doctype html><html><head><title>413</title></head><body>413: Request Entity Too Large</body></html>');
        }
      });
      request.on('end', function() {
        console.log("post end", requestBody);
        var formData = JSON.parse( requestBody );
        var number = Math.floor(Math.random() * 899999 + 100000);
        console.log("send sms twilio post end 1.0", formData.name , " ", formData.email, " ", formData.message);

        sendMail (formData.email, formData.name);
          response.write('[ { "id": 1, "action": "play", "text": "The notification email send via cloudmailin: ' + number + '" }]');
          response.end('');


      });
    }

  } else {
    response.writeHead(405, 'Method Not Supported', {'Content-Type': 'text/html'});
    return response.end('<!doctype html><html><head><title>405</title></head><body>405: Method Not Supported</body></html>');
  }

});
For complete source code, please see GitHub link for the source.
Step 6. Test the Easiio web chat form
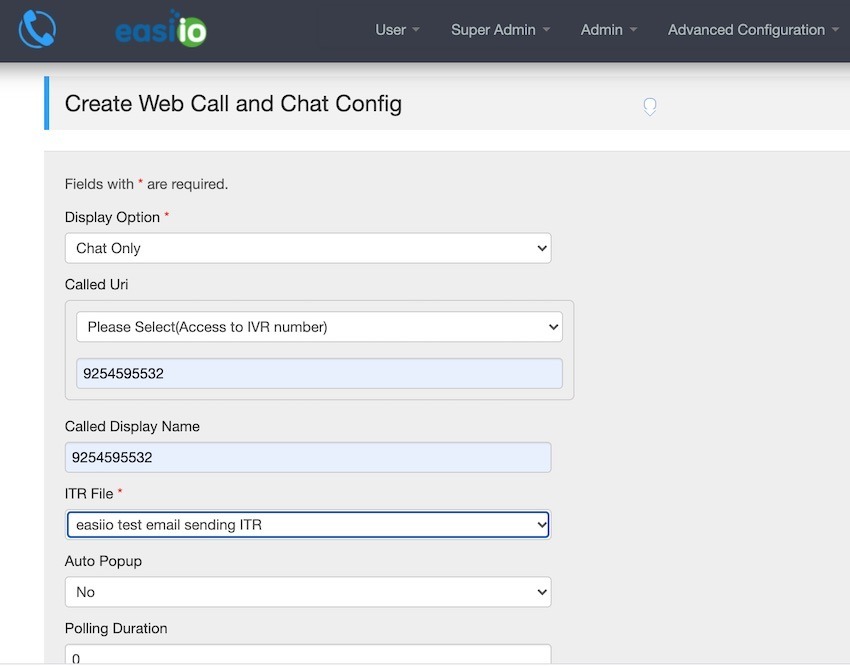
Once have the Easiio ITR configured, open the plugin testing UI by going to the "Admin" next "Web call and chat config" to open the configuration page. Click "Create" button to create a new config. Select the newly created ITR file name and save the config.
Click on the "effect" column "View" link to see the preview web chat page.

Following is the preview page, the developer can use this page to test the ITR before add to their website.
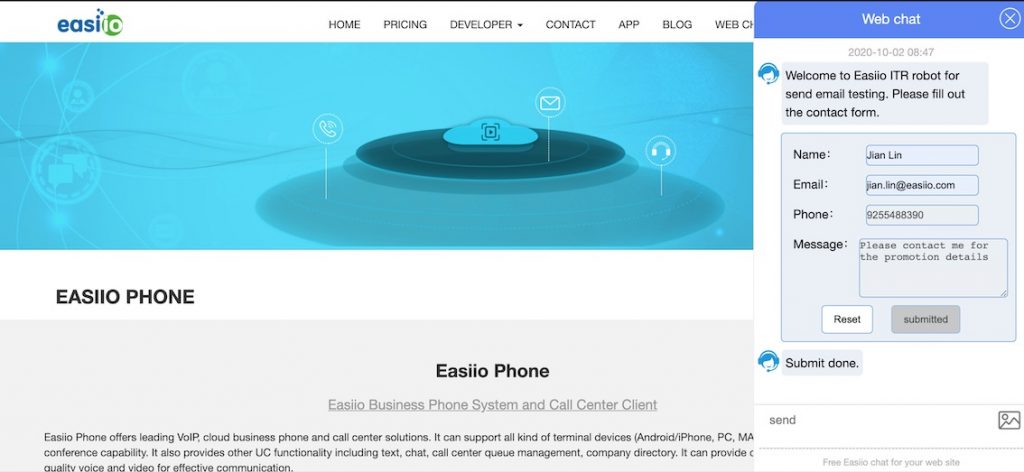
Fill in the form with name, email and phone, and then click on the submit button to send the request to the Node.js script.
You should receive email like this. That means that Easiio web chat plugin form submit to cloudmailin API successfully.

Conclusion:
From this blog, you can see it is very easy to use Easiio web chat plugin and cloudmailin to send confirmation email or other types of email as needed. It is a very flexible combination. The cloudmailin provides the flexibility for the email contents that should be a plus for developer need very dynamic email message based on user input. Easiio web site chatbot and live chat are free for the small support team. Signup here.
Other related blog or resources:
